Saving Out Logos and Branding Assets for Clients
Quick Tip!
Clearly label and organize logo and asset exports. This makes implementation easy and convenient for the client.
Helpful Staff for this Topic


This article explains how to export logos and branding assets for clients. When working with clients, the goal is to export many versions of the logo or assets using different file types and color modes to account for various client uses. File types to include for each asset are:
- Illustrator (.ai) file
- PDF file
- PNG file
- SVG file
Create a New Illustrator File
First, create a new Illustrator file. Select the CMYK color mode for print uses or the RGB color mode for web uses. You can check the color mode of an existing document under File > Document Color Mode.
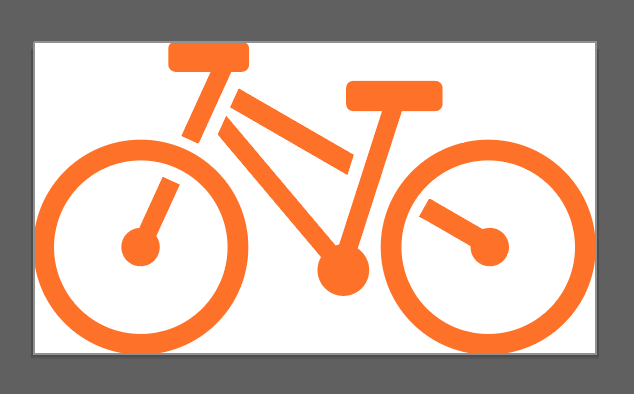
Next, copy and paste the final version of the logo or asset into the Illustrator file and save your document. This will serve as the color version of the logo or asset. Always keep a copy of your original logo file separate from the client Illustrator file. This will help to ensure the logo file is not lost and can be referred back to later.
Afterwards, fit the artboard to the logo or asset to eliminate extra space around the graphic. To do this, select the asset, then Object > Artboards > Fit to Selected Artwork.
Next, create a black and white version of the logo or asset. Duplicate the artboard and logo by selecting “Duplicate Artboard” in the Artboard panel. Edit the logo or asset colors to be in black and white. You may need to use shades of gray to preserve details of the logo.
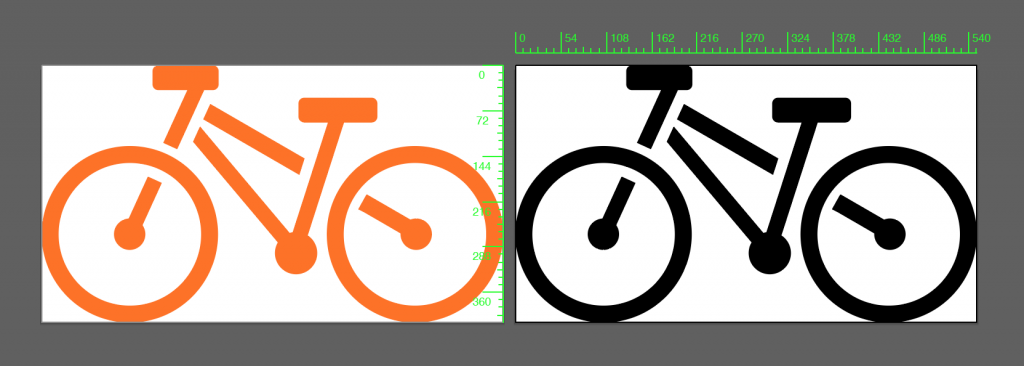
Then, create a white-on-black version of the logo or asset. Duplicate the logo and artboard again, and add a black background behind the logo. Select the logo and make it white. Finally, remove the black background. The logo will blend in with the white artboard, but will be visible when exported with a transparent background.

Prepare the Illustrator File
After multiple versions of the logo or asset are created, the Illustrator file needs to be prepared for asset exports.
First, outline any text used in the logo or asset. Outlining the text changes the text from editable type into a vector fill. This step will ensure accurate resizing of the text and that the .ai file will not break if the client doesn’t have the correct font file installed.
To outline the text, select all the text, then select Type > Create Outlines. This is a one-way change, meaning the text will no longer be editable after this step. Because of this, it is recommended to keep an extra copy of the logo or asset file with editable text.
Next, expand all strokes used in the logo or asset design. This action will convert any strokes into filled shapes, which ensures the logo or asset will resize accurately. To expand the stroke, select all of the strokes in the document, then select Object > Expand > Ok.
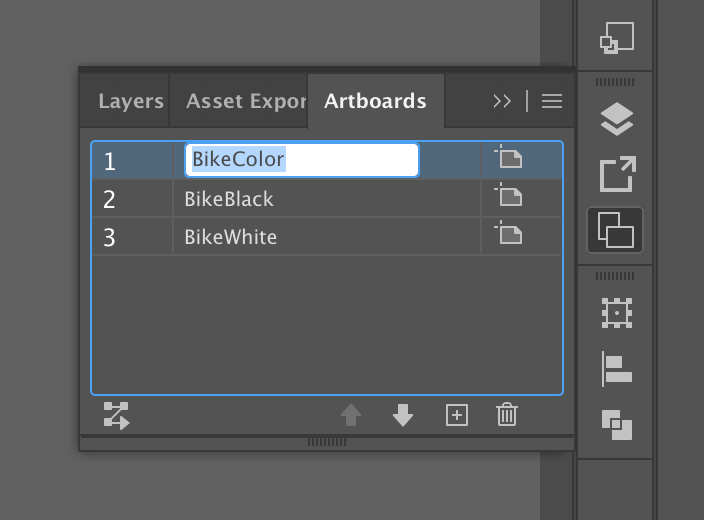
Then, name the artboards to reflect the version of the logo or asset they contain, such as color, black, or white. The artboard names will transfer to exported files. Be sure to name files in an appropriate and organized manner. To rename an artboard, double-click the name of the artboard in the Artboards panel.
Additionally, organize the layers in the layers panel. Each logo or asset version should be on its own layer and named appropriately. This ensures those revisiting the file can easily navigate the document. To rename a layer, double-click the name of the layer in the Layers panel.
Export the Logo or Asset Files
Now that the Illustrator file is prepared, the logo or asset files can be exported.
Save Illustrator Files
First, save the logo or asset versions as separate Illustrator (.ai) files. Including an Illustrator file insures other designers can access the logo or asset if needed. To save the Illustrator files, select File > Save As > Save > Check “Save each artboard as a separate file” > Ok.
Save PDF Files
Next, save a PDF file of each logo or asset. Including a PDF file is helpful as it is a file most people can open on their computer. To save each artboard as a separate PDF file, select File > Export > Export for Screens. Then specify PDF in the Format dropdown. Check off the artboards to be exported and hit the Export Artboard button.
Save PNG Files
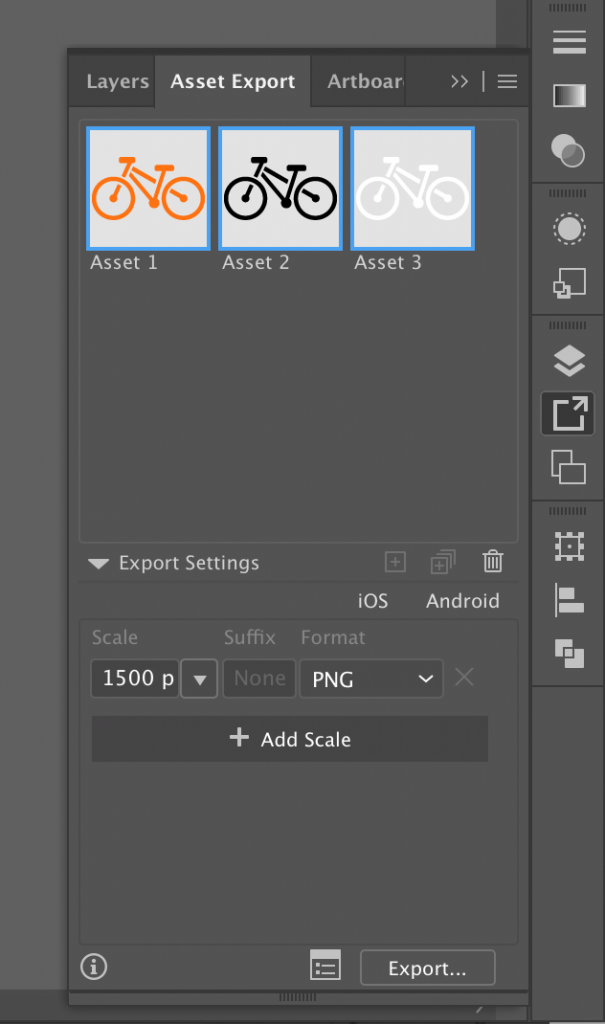
Then, export the logo or asset versions as PNG files. It is crucial to include PNG files, as they have a transparent background that allows the logo or asset to be easily incorporated into client designs. The Asset Export panel is used to export many PNG files at once. Add a graphic to the Asset Export panel by selecting a logo or asset and pressing the (+) in the Asset Export panel. Repeat for all Assets. Next, select all the assets in the Asset Export panel and set your Export Settings. Choose “Width”, set the width to 1500px, and choose PNG. This ensures the PNG file is big enough to use in most web and print cases. Finally, select Export > Choose. This will place all of the logos or assets in the same folder.
Save SVG Files
Finally, export the logo or asset versions as SVG files. SVG files are great for displaying vector images, such as logos or assets, on websites. To export an SVG, select File > Export As > Choose SVG > Save > Ok. Repeat for each version of the logo or asset. The Asset Export panel can also be used to export multiple SVG files at once. Simply select SVG under Export Settings in the Asset Export panel and export the assets.
Compile Logo or Asset Files into One Folder
Now that all versions of the logo or asset are exported, compile the files into one folder. Name the folder clearly and appropriately, like “[Client Name] Logo Exports.” Make use of clearly labeled sub-folders to organize by file types or logo versions. For example, one could group all exported PNG files into a folder titled PNG files, or group all black and white versions into a folder titled Black and White logos.
Also include any style guides or important information regarding the logo or assets in the combined folder. However, do not include font files in the folder for the client. This action can be a violation of copyright laws. Instead, offer a link to where the client can download the font with proper licensing.
The logo and asset exports are now ready for the client. Communicate with the Staff and Brandon to have the graphics delivered.