Advanced Primatte Tips
Quick Tip!
Make sure your computer or monitor has accurate color settings before you start working on keying. This will help make your color correction and overall key more accurate.
Helpful Staff for this Topic

When keying footage, color correction can make the difference between a solid key and one that misses the mark. That’s why the keying process always begins with general color correction to make sure the key looks good. However, there can be problems with the footage that can’t be fixed with a single pass of color correction. This article will address how layered color correction effects can address motion blur on movement and issues with skin tone. It will also include general tips and tricks that can help address common issues that pop up while keying.
Learn about the basics of keying here.
Quick Tip!
The best thing to do to get a good key is to shoot good, high quality footage. Always use the Ninja, check your exposure and focus, and collaborate with co-workers to make sure that what you’re filming is shot in a way that will make it easier to edit.
Motion Blur
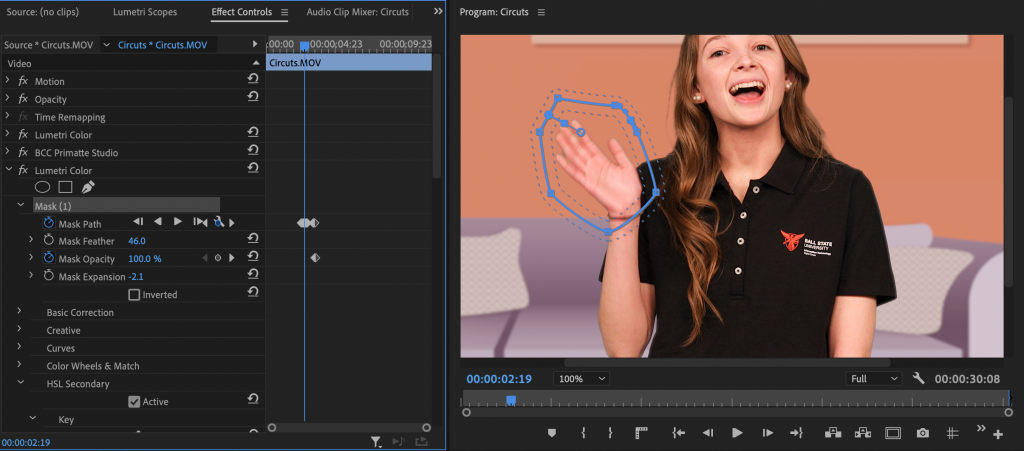
Motion blur occurs when a person moves on camera and the footage wasn’t shot at a high enough frame rate to capture the movement fully. The result is a bit of blur around the moving part. For projects at the Digital Corps this usually comes up when a person waves or makes lots of hand gestures on the green screen. If the blur can’t be fixed with the Primatte effect, it may be fixed using stacked color correction.

Start with general color correction of the footage, targeting between 60 and 70 on your green values in the RGB scopes. Then complete the initial key. After keying the footage, begin targeting the motion blur. Apply another Lumetri Color effect onto the footage. This should be a separate effect than the one used to initially color correct your footage.
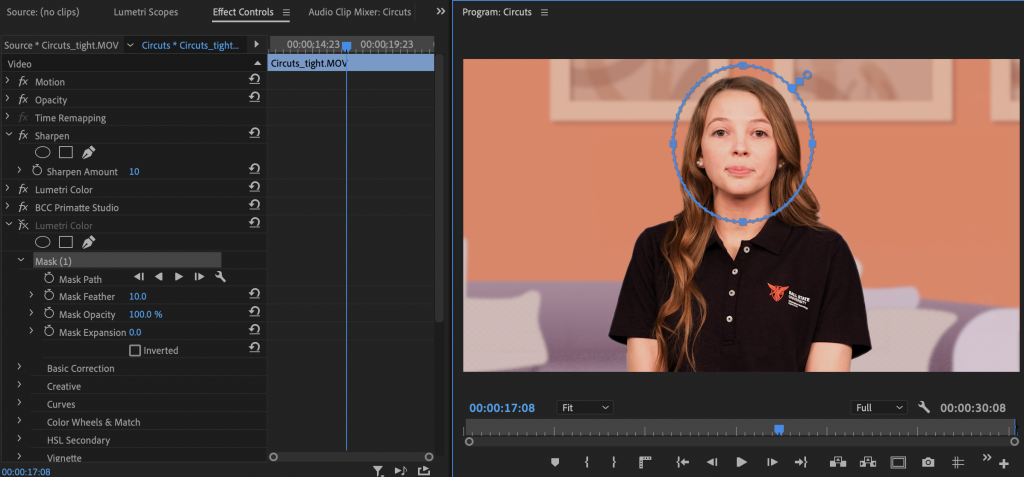
Once a new Lumetri Color effect has been added, create a mask around the motion that is creating a blur. This mask should have a large amount of feather to prevent a hard color line around the affected area. Motion track the mask to follow the motion of the moving body part. Make sure all of the motion blur is always within the boundary of the mask and the feather. This may require you to change the mask shape or keyframe the mask path.
Use this effect to try to remove the green color from the blur. This initial effect may turn the blur into a different color, this will be addressed later in the process. Try using set and remove color functions under the “key” drop-down function. Use the remove color dropper to target the green area.
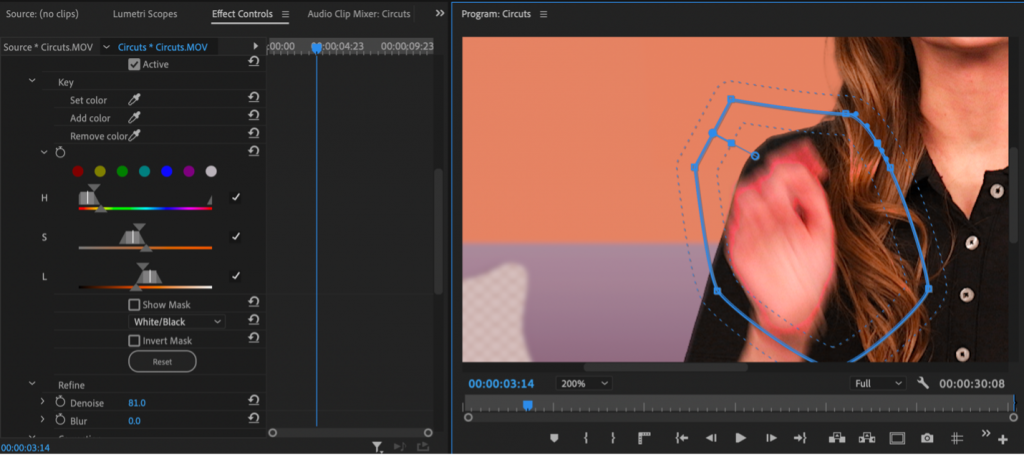
This photo demonstrates how the applied effect caused the blur to appear pink instead of green.
In addition to the “key” functions, you can use the correction wheel to change the tint. In this effect the tint is shifted more towards a skin tone color.
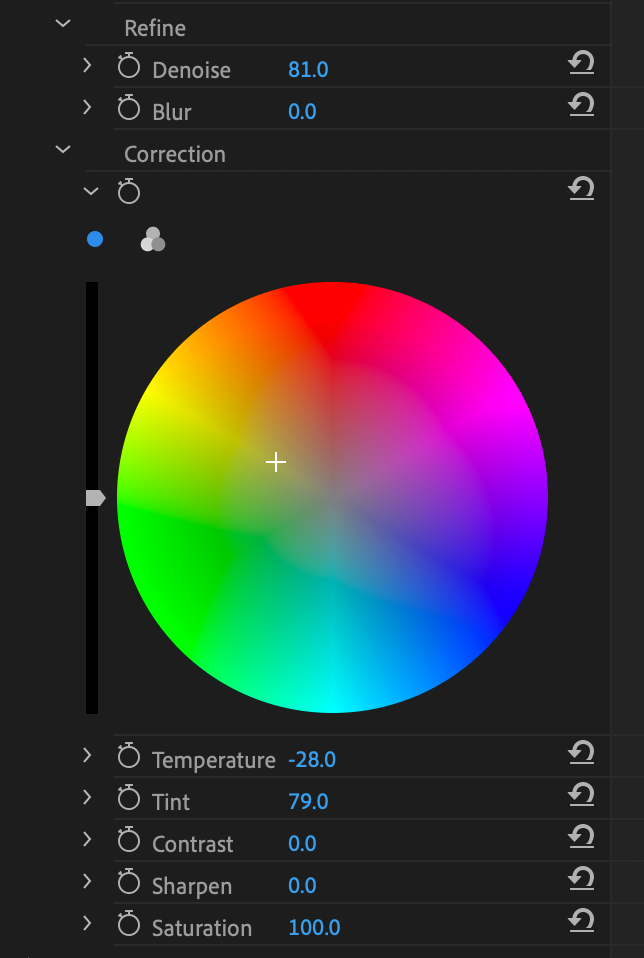
Shifting the tint may not remove the new color from the blur. To achieve that it may be necessary to add another layer of the Lumetri Color effect. Copy and paste the effect that was just created and then reset all of the settings to standard. Keep the mask. This will ensure that the second effect is applied to the same area that the initial mask was applied.
Within the second effect use the same process with the set and remove color to target the pink area and remove it. If this function doesn’t get rid of all the pink, changes to Hue Saturation Curves can do the trick.
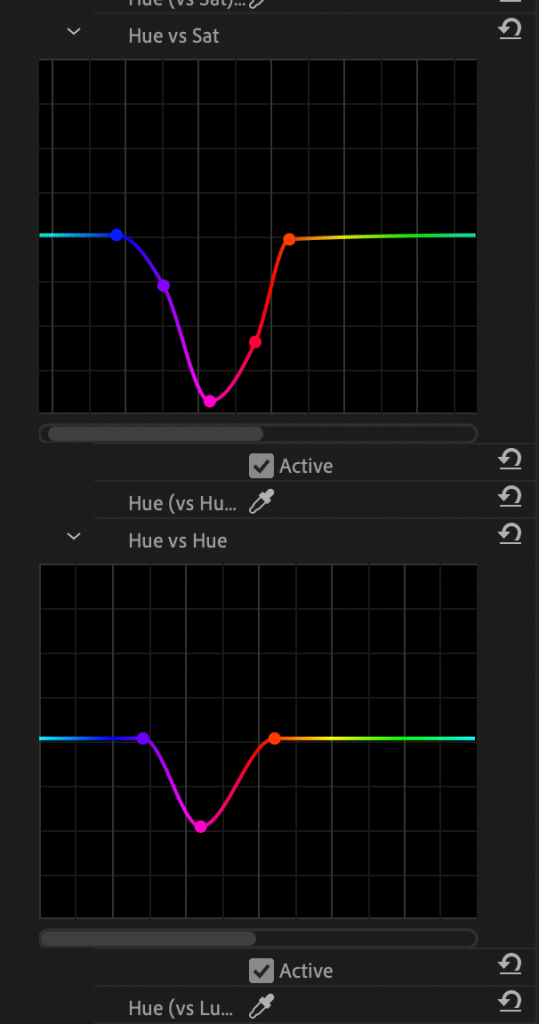
For this key, the pink was removed by creating a point on the pink section of the Hue Saturation Curves. That section was then lowered. Create boundaries on the surrounding colors, then move the selections around until the target color gets desaturated. This should leave behind a convincing skin tone color on the motion blur. The results from the combined effects can be seen below.
Skin Tone
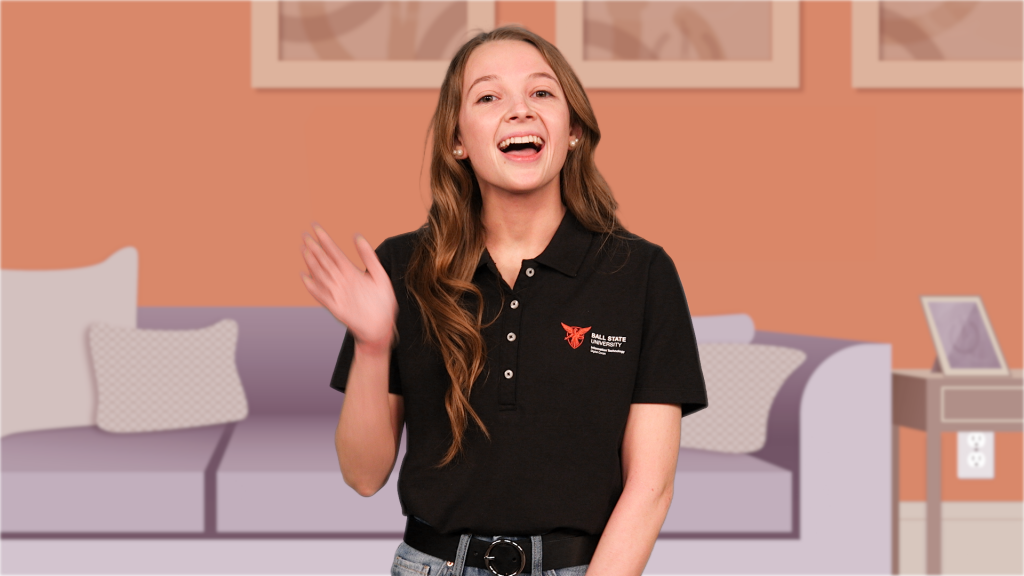
When filming footage on the green screen, it is important to expose properly for the key. However, when focused on exposure for the green screen sometimes the exposure isn’t right for a person’s skin tone. This can show up in a few different ways. A person’s skin tone can look washed out, or over-exposed like in the photo below.

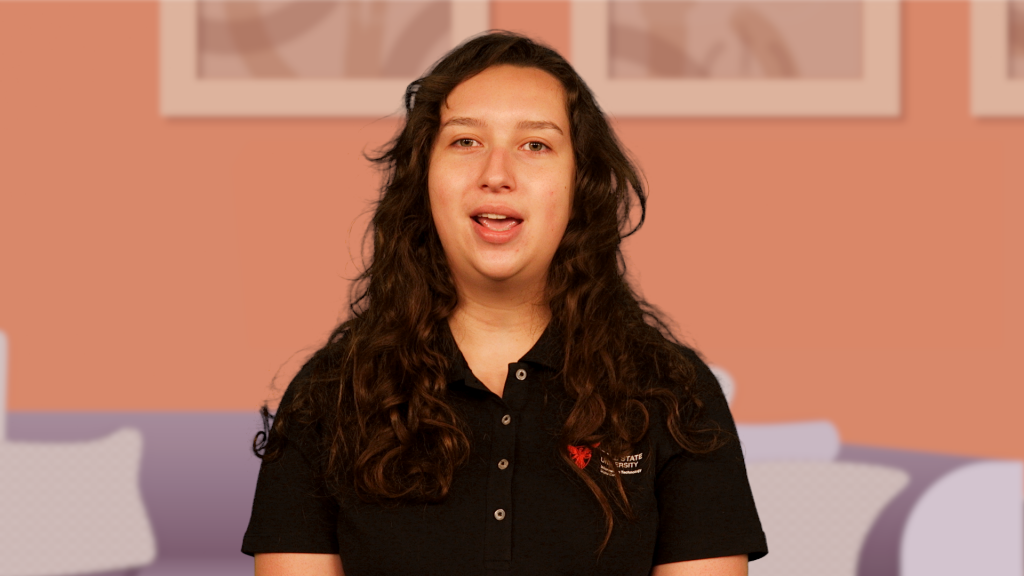
A person’s skin tone can also look oversaturated or tinted on the green screen. Their real skin tone may not be accurately represented in the captured footage.
Sometimes this can be fixed through changing the overall exposure correction or white balance of the footage. However, this can sometimes negatively impact the color of the green screen—making the key much harder. In this case, skin tone can be adjusted through stacked Lumetri Color Effects.
Begin by doing an initial color correction of the footage, targeting the proper scope range for a solid key. Then apply a second Lumetri Color Effect. This can occur before or after the key. Apply a mask to the section of their skin you are targeting. That can be the person’s entire body, or just one section.
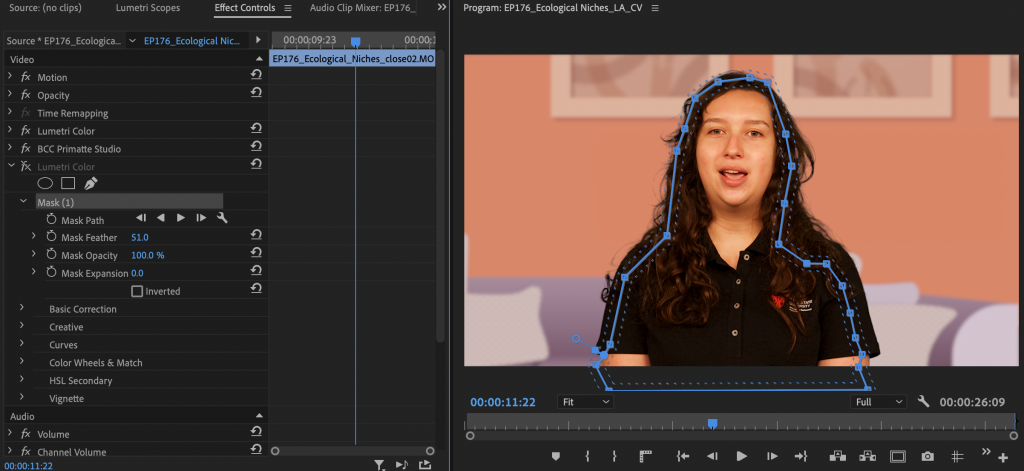
The mask area and feather should be adjusted to limit the impacts on area outside of the targeted area. Depending on how much the person moves it may be necessary to keyframe the mask path and shape to move with the target areas.
After creating the mask change the color settings to achieve the desired goal. If the goal is to desaturate the skin tone the amount of saturation can be shifted. If a section of a person’s face is blown out it may be necessary to change the highlights or whites.

Using this technique ensures that the key looks sharp, and the talent looks the best they can.
Secondary Spill
Another common issue when keying is the amount of secondary spill. This occurs when the reflection of green light from the green screen appears on the talent. Often this shows up on their cheekbones or in their hair.
Quick Tip!
Avoid secondary spill by pulling the curtain around the side of the green screen. Minimizing the amount of reflections that can come from the side of the green screen will help reduce the overall amount of secondary spill.

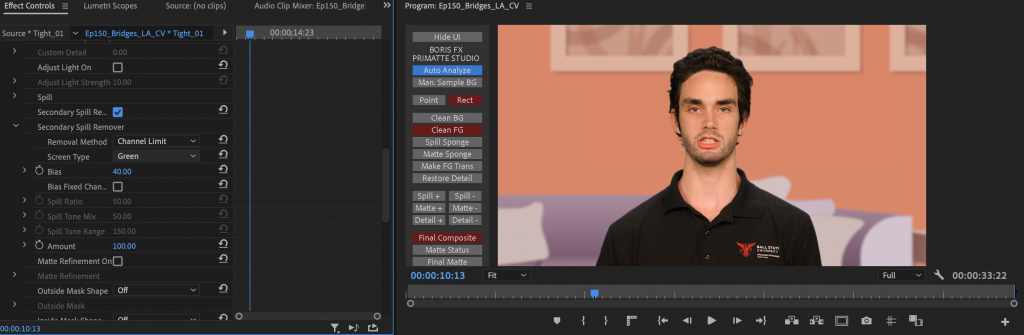
At the Digital Corps we use Primatte to key. Primatte has a secondary spill button built in that can usually address a good amount of the spill that comes up. However, if it isn’t able to get rid of all of it there are a few things you can do to try to fix it.
Screen Bias
The standard settings for the secondary spill button in Primatte can be adjusted to make the secondary spill remover more effective. If selecting the checkbox is not getting rid of all of the spill, try changing the screen type to “green” and reducing the bias value from 50 to a lower value. The more you reduce that value the more tinted pink the person will appear. But finding a good balance with this value can remove the green while keeping the skin tone looking natural.
Spill Sponge
Another technique that can be used to target secondary spill is the spill sponge. This can be found in the H.U.D. panel. This effect is applied in the same way the Clean FG and Clean BG selections are used. The spill sponge is a very sensitive tool, it makes drastic changes to tint through just a small amount of use. It is suggested you use the point tool to apply it if you use this function. It is particularly helpful in removing secondary spill showing up around a person’s ears or neck.
Conclusion
There are many tools to help improve the quality of your key. General color correction doesn’t always address issues within footage. But when footage needs to be keyed, targeting specific areas can be difficult. In this case stacking Lumetri Color effects can help address several of the issues that come up often on projects at the Digital Corps. Different functions within Primatte can be used to address other issues like secondary spill. Overall, the best tool when dealing with tricky keys is experimentation. Be willing to try new tools and ask for help. Utilizing these tricks will improve the overall look of keys here at the Digital Corps.